Appearance
Actions
Actions change the properties or cause movement though a model during a simulation run. The current types of actions are explained in the following sections but with the expandable design of EMRALD, additional or customized actions may be added.
Immediate and Event Actions
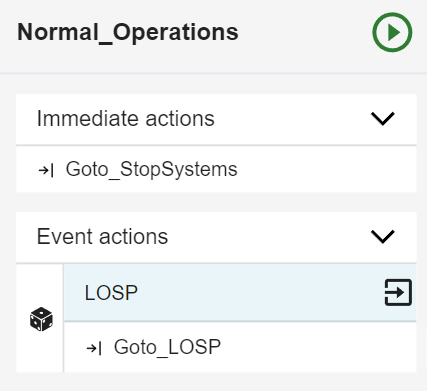
Actions that are triggered immediately are listed in the Immediate Actions section. Actions that are triggered upon completion of an event are listed under their associated event in the Event Actions section.
Creating a New Action
Option 1:
Open the Diagram you would like your action to be in. Locate the State you would like to add the action to and either right-click on the immediate action label or on the event you would like to add it to. Click "New Action". 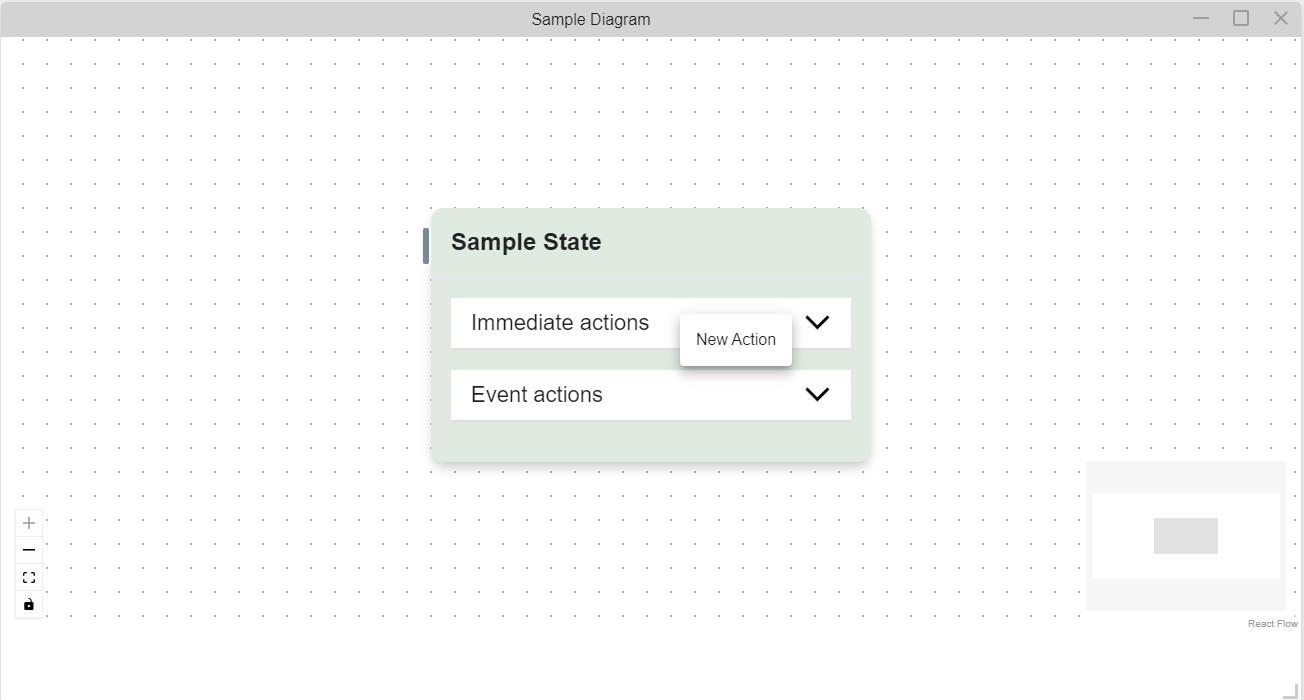
Fill out the dialogue box and press "SAVE". A description is optional. 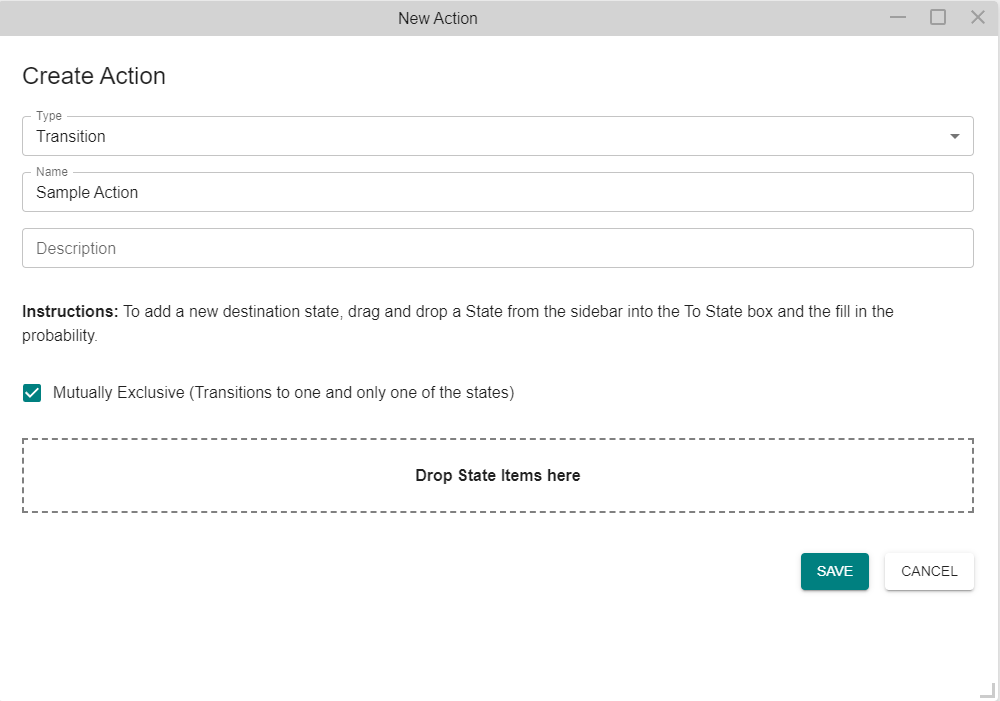 See Types of Actions for detailed description of dialogue box options for each type of action.
The action name cannot be the same as any existing action in the model. If it is, an error message will appear notifying you to choose another name.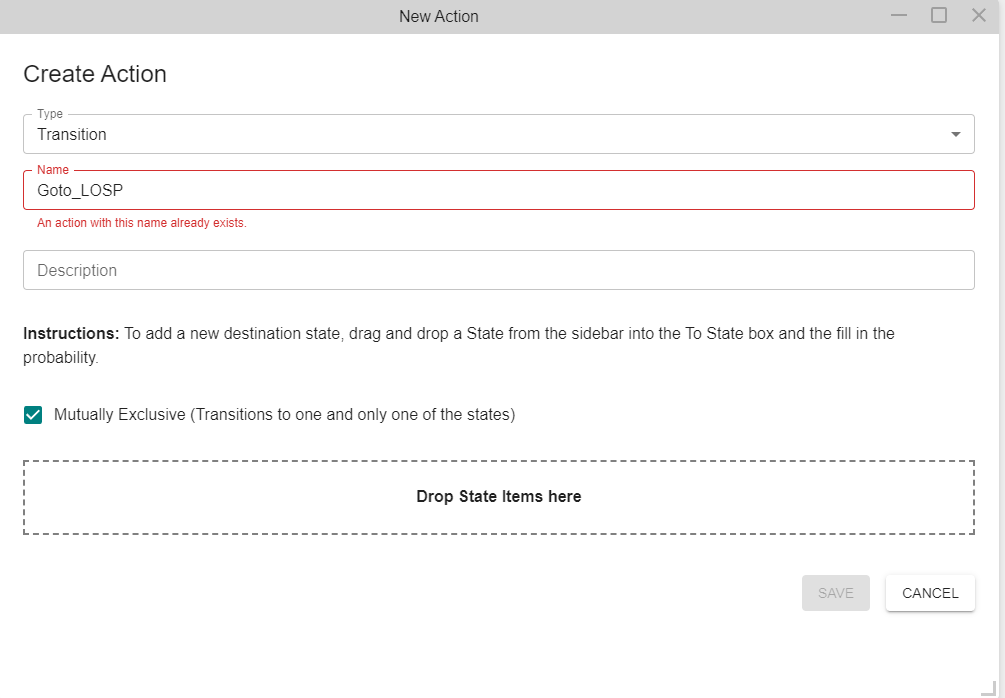
The action will appear in the Immediate Actions list or Event that you initially clicked in. 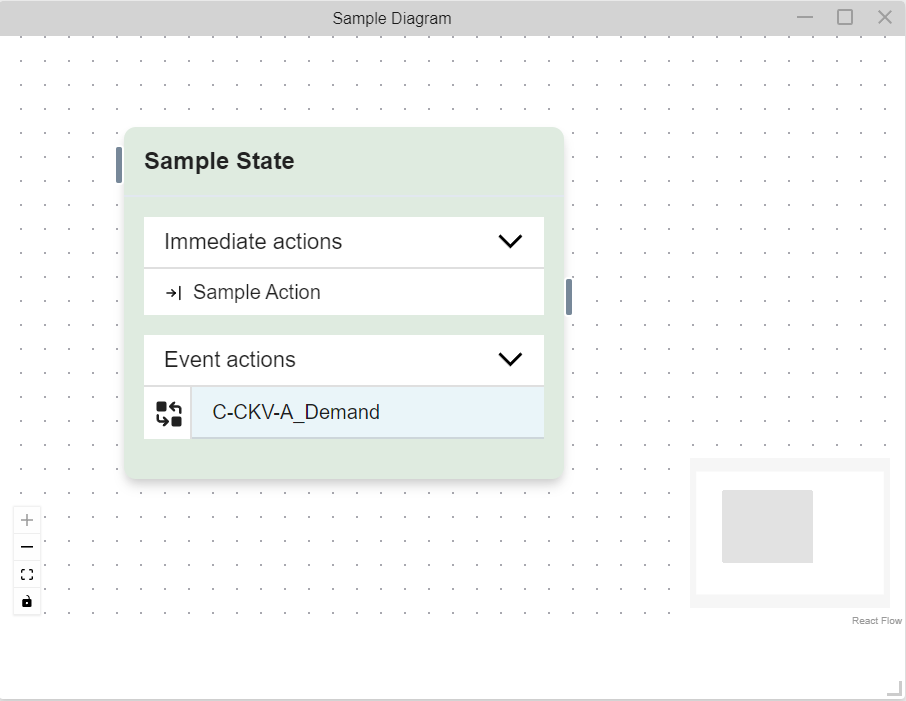
Option 2:
Click on the Global tab in the Left Navigation Frame Modeling Pieces Tabs. The descriptor for each section under the tab should have changed to Global.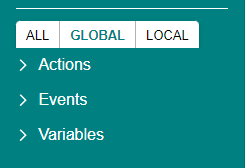
Then right click on Global Actions. A dropdown menu will appear, click on "New Action". 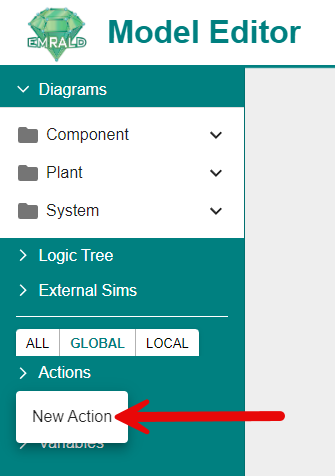
Fill out the dialogue box and press "SAVE". A description is optional. 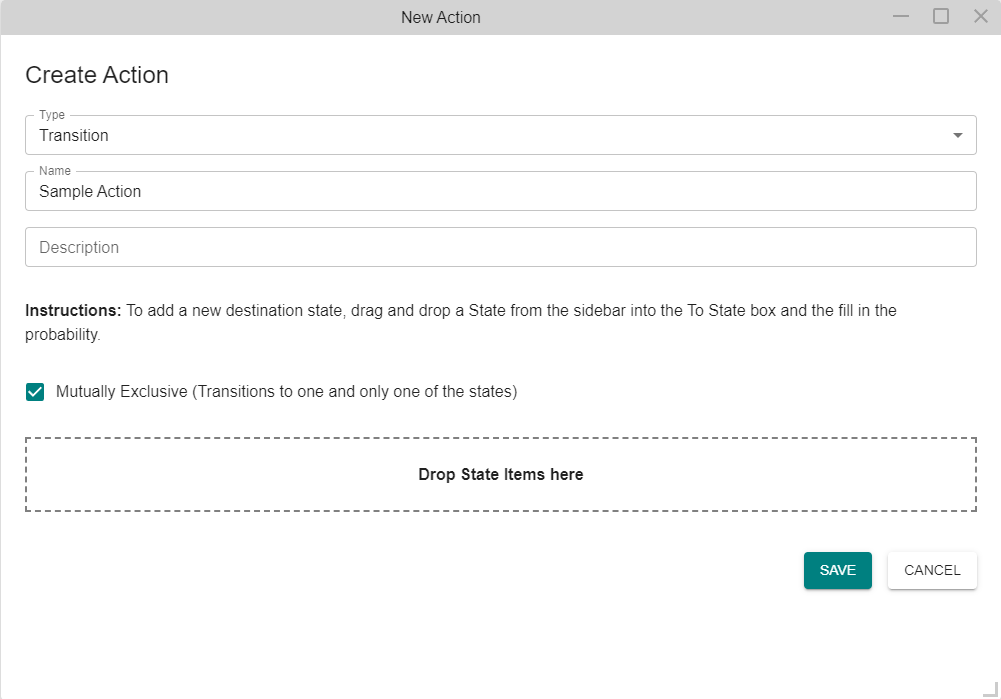
See Types of Actions for detailed description of dialogue box options for each type of action.
The action will appear in the Global Actions list. 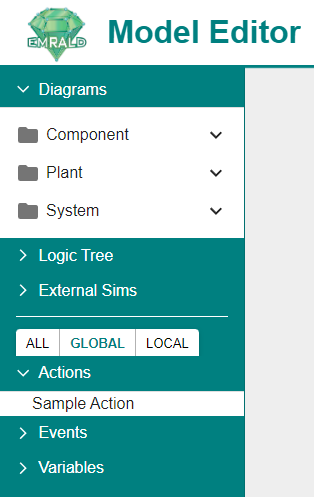
Adding an Existing Action
In the Left Navigation Frame, locate the action you would like to re-use. Click and hold on to the action and drag it to the Event Actions section until a plus symbol shows and release your mouse.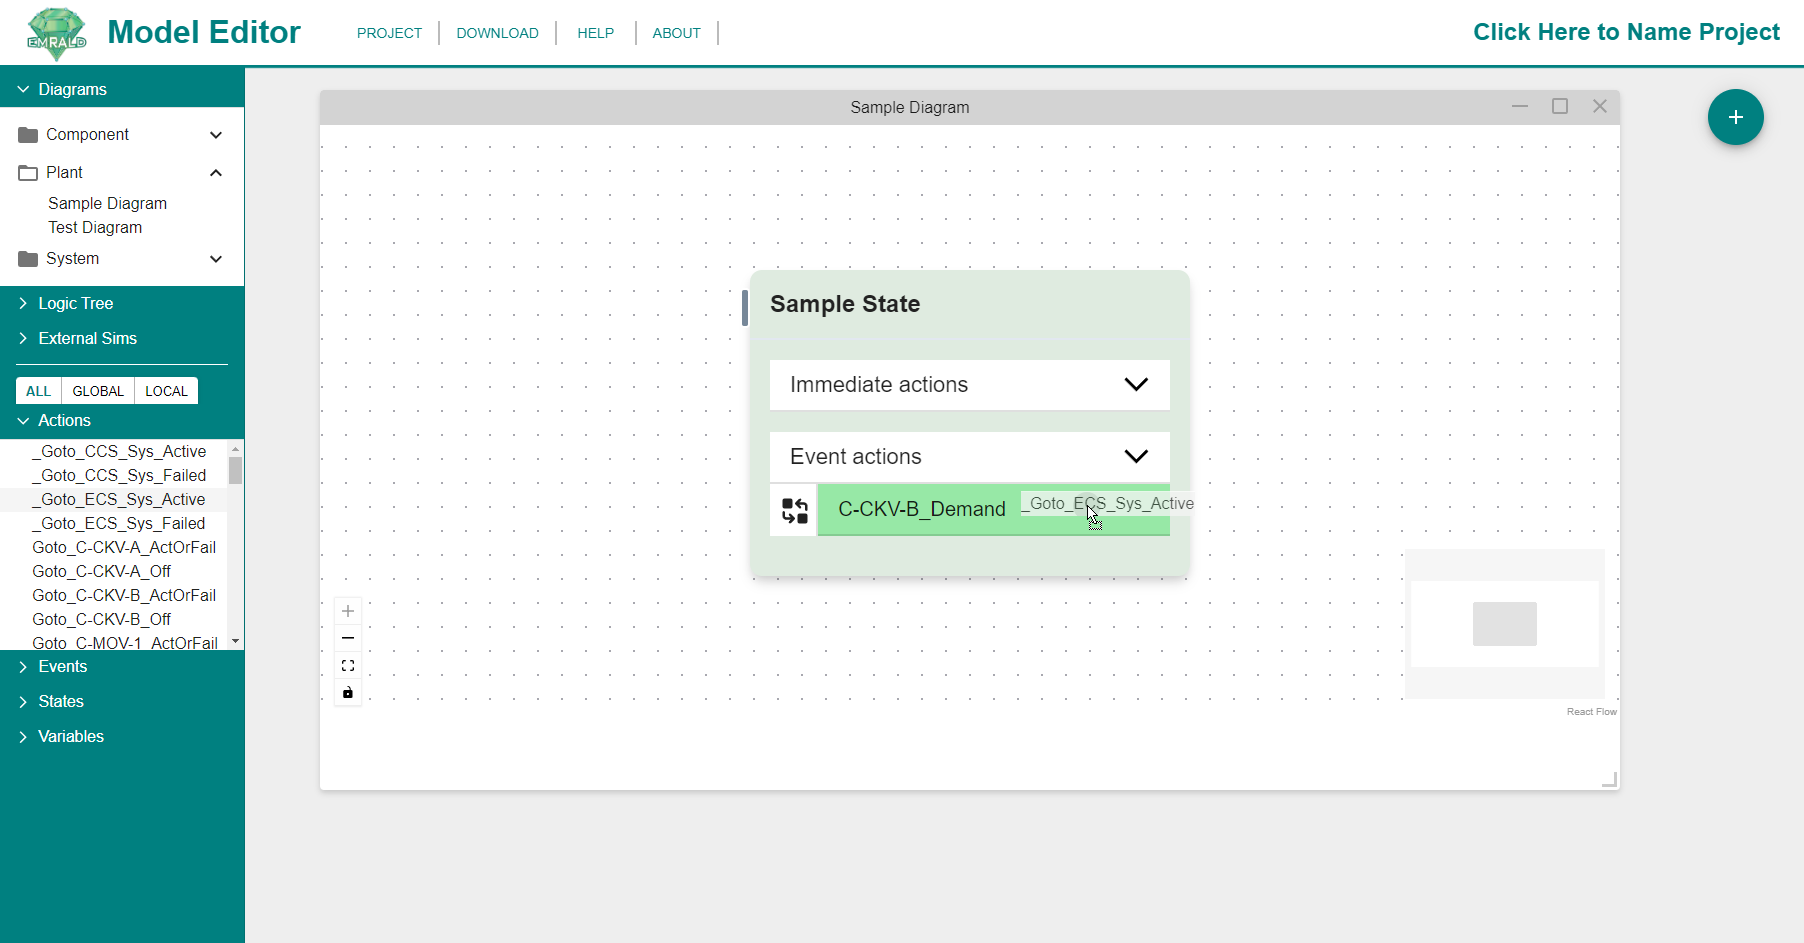
The event will appear in the Event Actions section.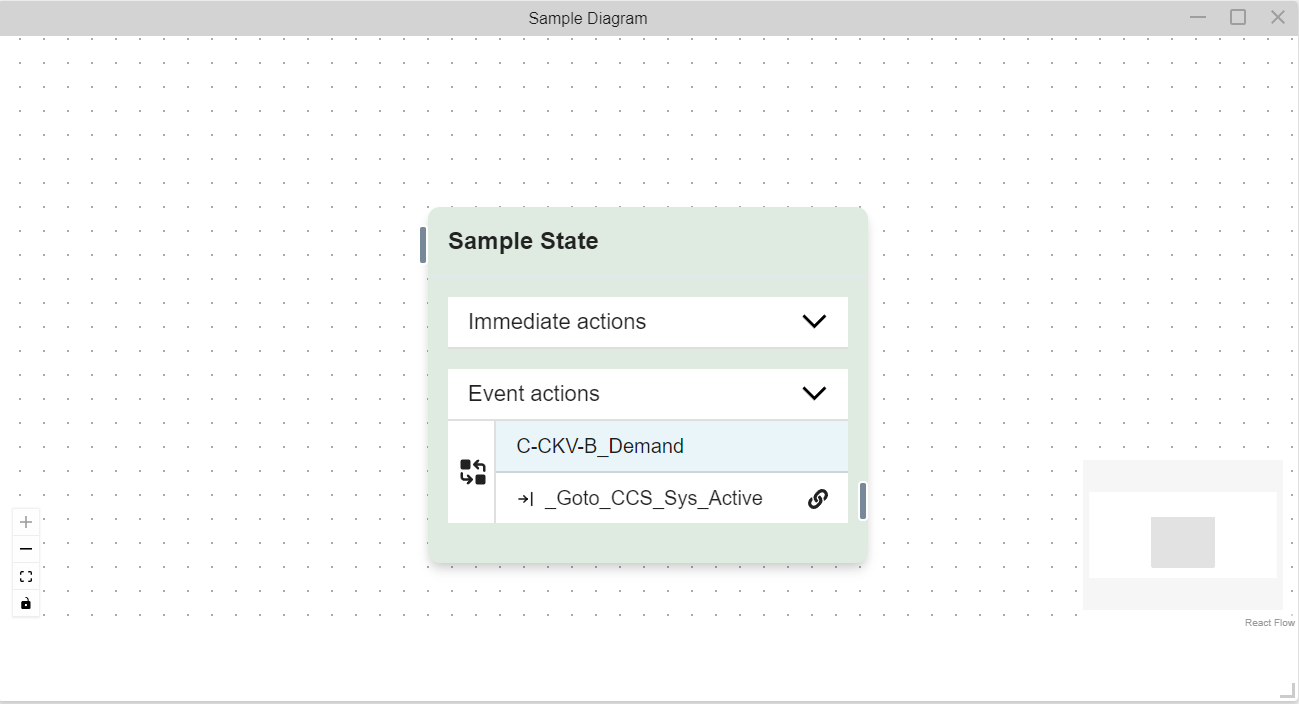
You can also add an action in this way to the Immediate Actions section. You would just instead drag it to the Immediate Actions section and it would appear there.
Editing an Action
Option 1:
On the Left Navigation Frame, click on the tab (All, Global, or Local) where your action is located. If you are not sure which tab, click on the All tab. Right-click on the action and click "Edit Properties".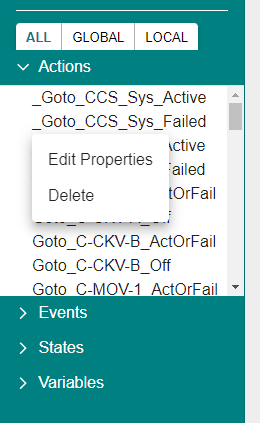
The Action Properties window should appear in the Modeling Area.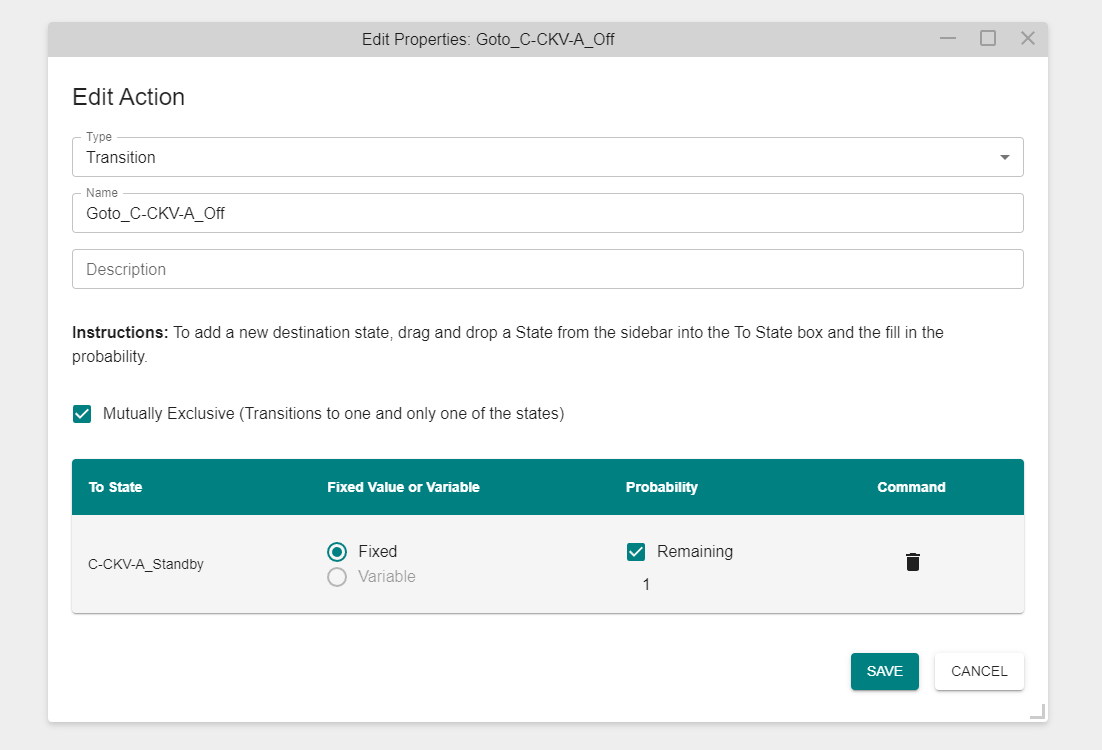
Option 2:
Open the Diagram containing the action and locate the action. Right-click on the action and click "Action Properties".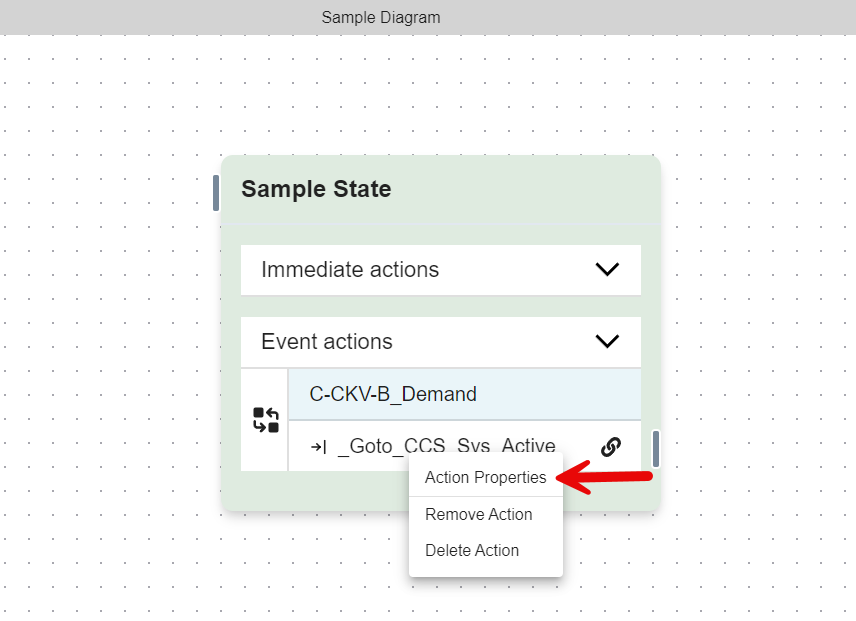
The Action Properties window should appear in the Diagram Window.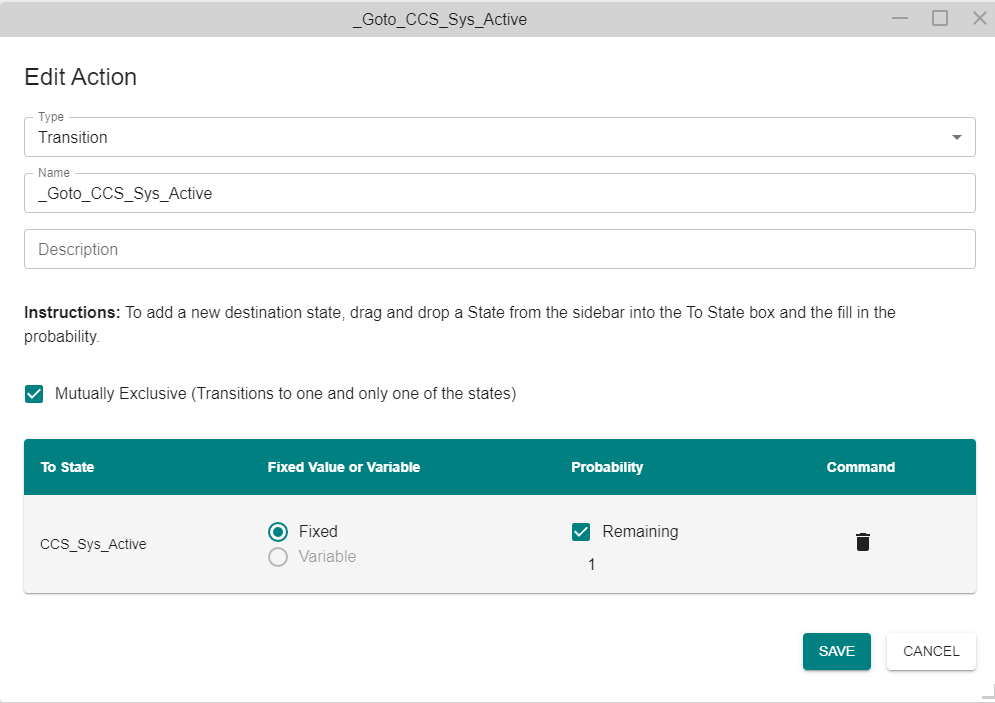
Removing an Action
Open the Diagram containing the action and locate the action. Right-click on the action and click "Remove Action". Use caution when removing because no confirmation window will appear. 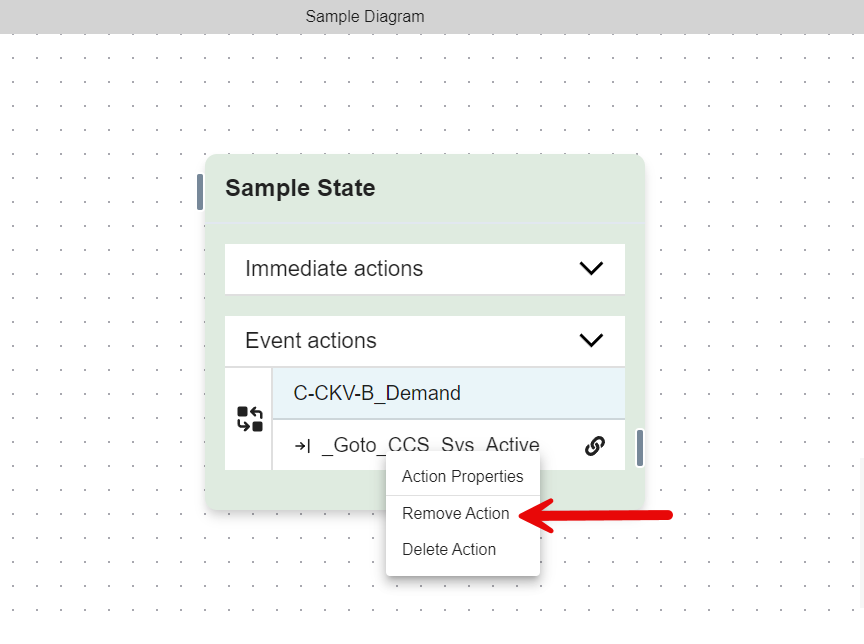
The action will no longer be listed in the state but will still be listed in the Left Navigation Frame. It was only removed from that instance, not the model. It will only be removed from the Left Navigation Frame if it was the only instance in the entire model. 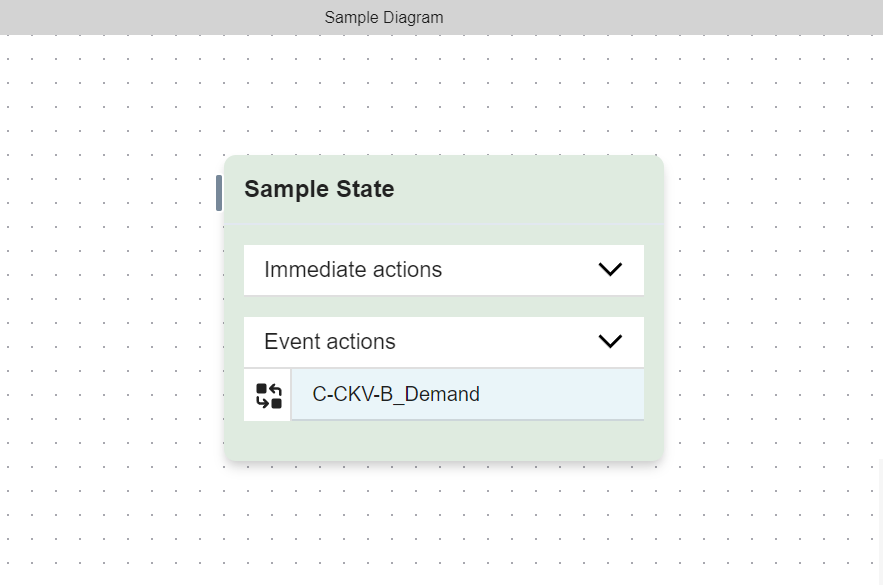
Deleting an Action
Option 1:
On the Left Navigation Frame, click on the tab (All, Global, or Local) where your event is located. If you are not sure which tab, click on the All tab. Right-click on the action and click "Delete".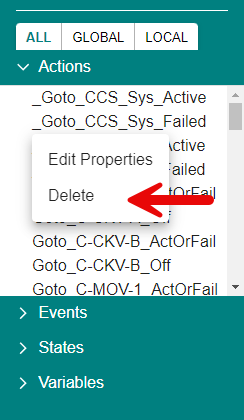
A confirmation window will appear in the Modeling Area. Click "DELETE." 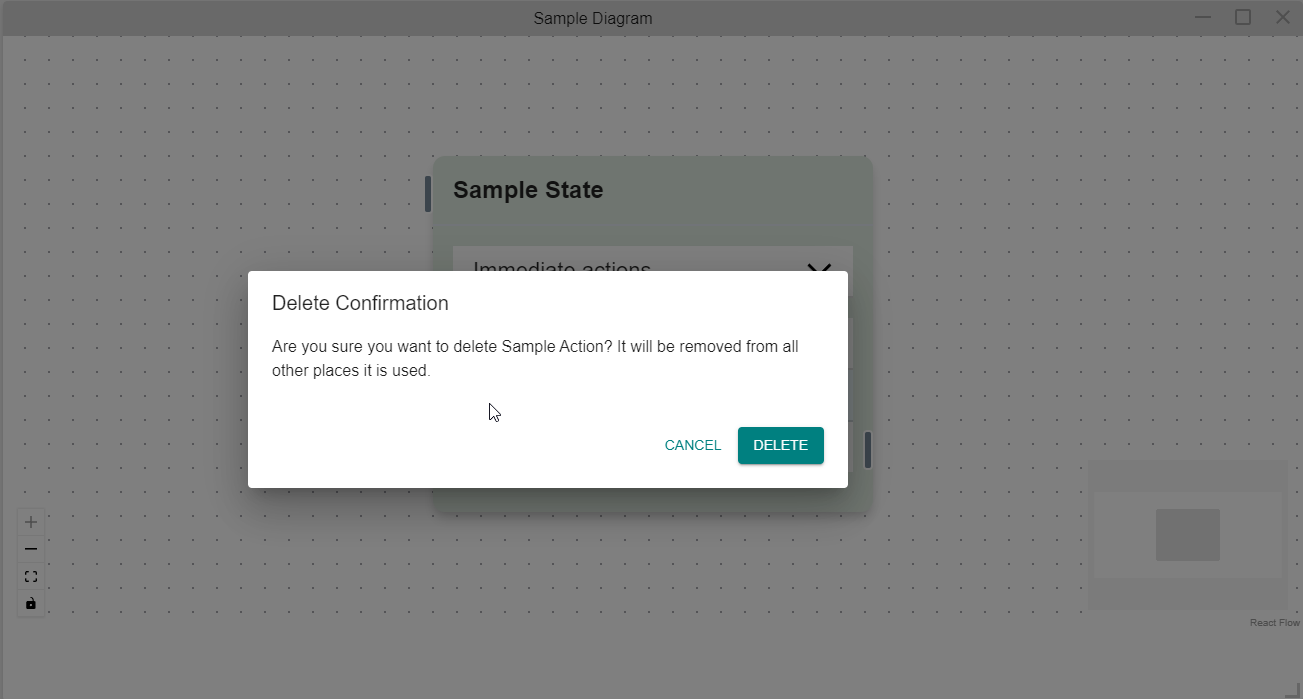
The action will be deleted from the entire model and no longer be listed in the Left Navigation Frame. 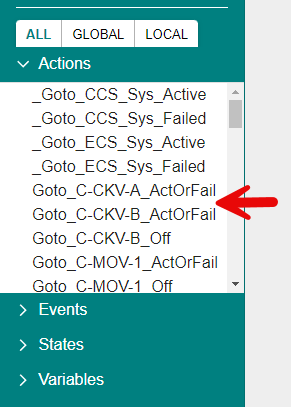
Option 2:
Open the Diagram containing the action and locate the action. Right-click on the action and click "Delete Action".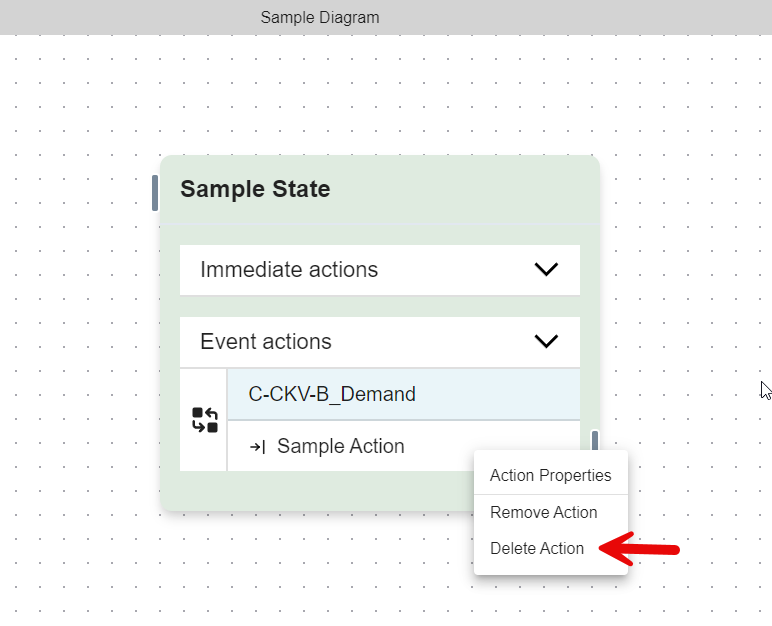
A confirmation window will appear in the Modeling Area. Click "DELETE."
The action will no longer be listed in the state and will no longer be listed in the Left Navigation Frame. 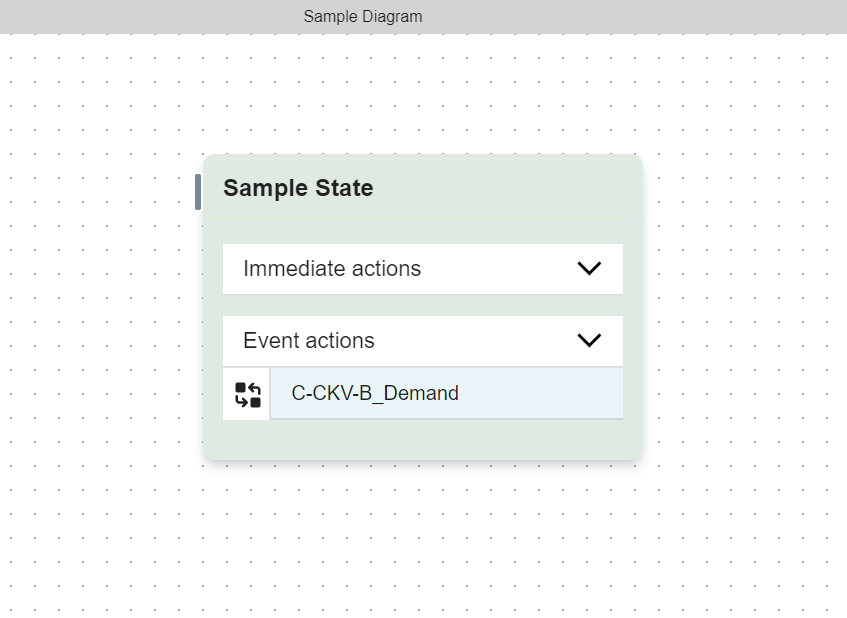 Use "Remove Action" to just remove it from the selected state.
Types of Actions
Transition 
A transition action always adds the state it references to the current state list, meaning that it is now in that state during the simulation. If the event is marked as "Exit" when it occurs, (See State Properties and Editing an Event for more information) then the model is moving from the one state to the other. A solid black arrow indicates moving, and a dashed green indicated adding to the current states. A transition action in the "Immediate Actions" list (See Immediate and Event Actions for more information) will always be adding to the current states because there is no event with an exit property and it would be bad modeling to exit a state immediately after entering, making it possible for other immediate actions to not be executed.
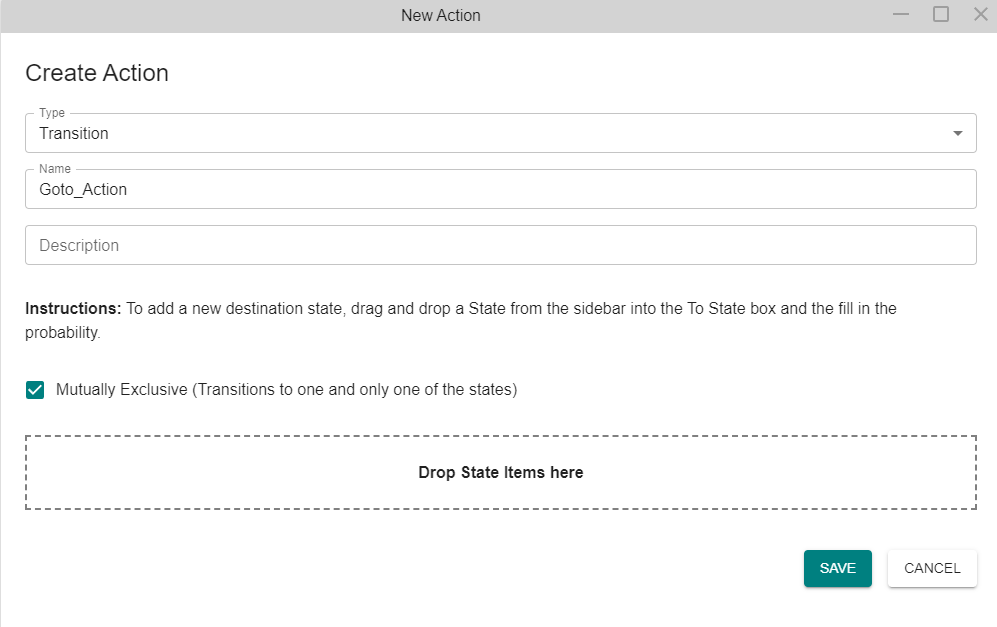
- Mutually Exclusive: Check this box if you would like the action to transition to one and only one of the states in the list. If not checked, all destinations must either add up to 100% or use "Remaining" on the last destination and one of the destinations will be sampled. If checked, then multiple or no destinations could be added to the current state list. A sample is taken for each item and all the destinations that meet the stated probability are chosen.
- State Table: To add a new destination state, go to the Left Navigation Window, click and hold on to the desired state and drag it to the table until a plus symbol shows and release your mouse.
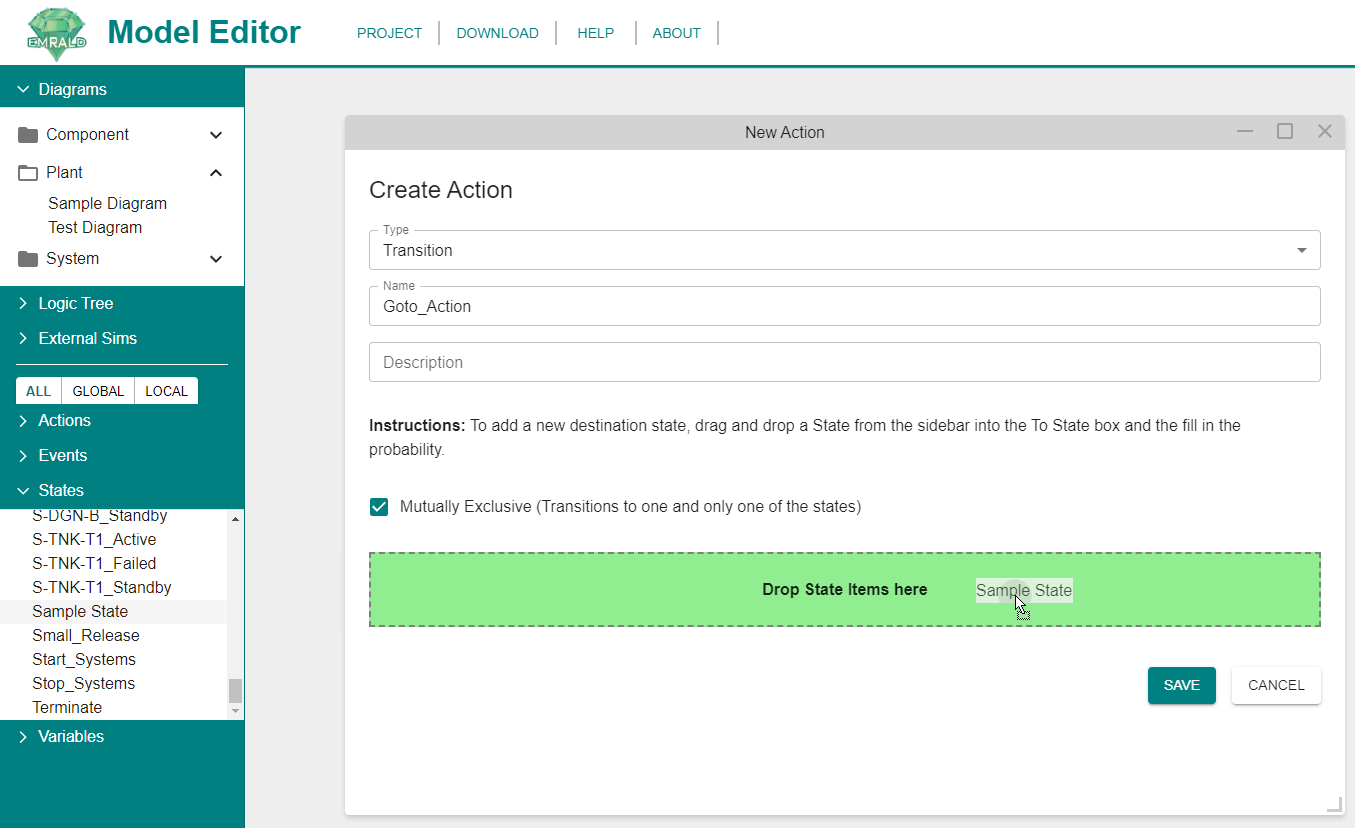
The state will be listed in the table.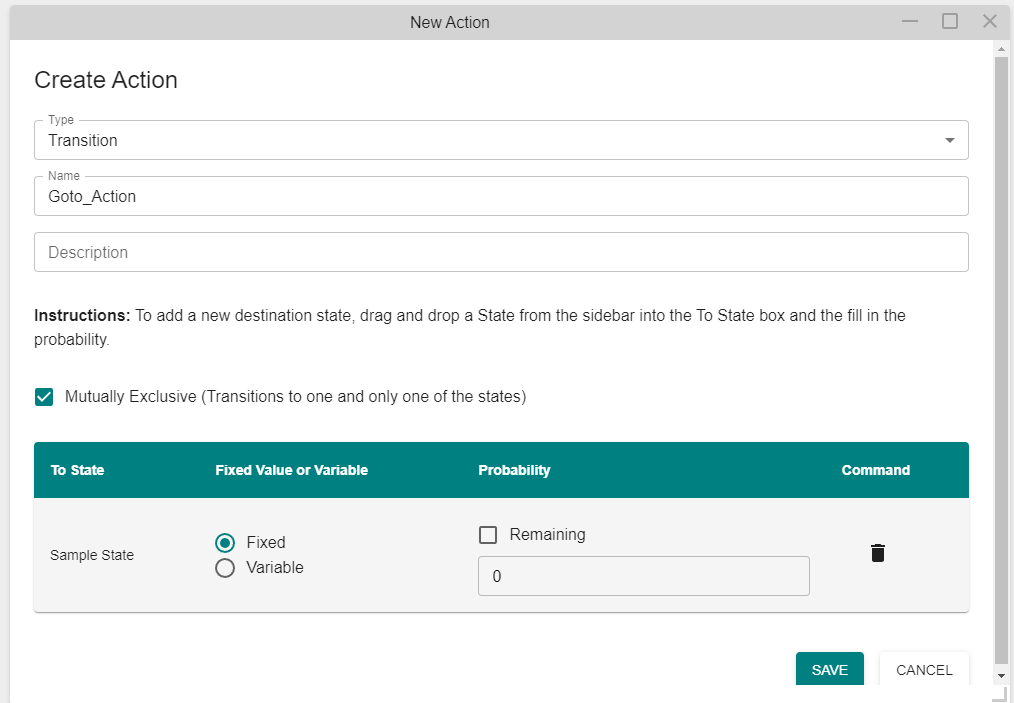
Then fill in the probability. You can either fill in a constant value from 0.0 to 1.0 in the second column or you can choose a variable probability in the third column by clicking the field then clicking the variable you want to define the probability. The variable allows you to dynamically change the rate according to other conditions, but if the variable changes after entering the state, a new sample will not be made.
Change Variable Value 
Listed as "Change Var Value" in the dropdown menu. This action changes the value of a variable according to a user defined script. 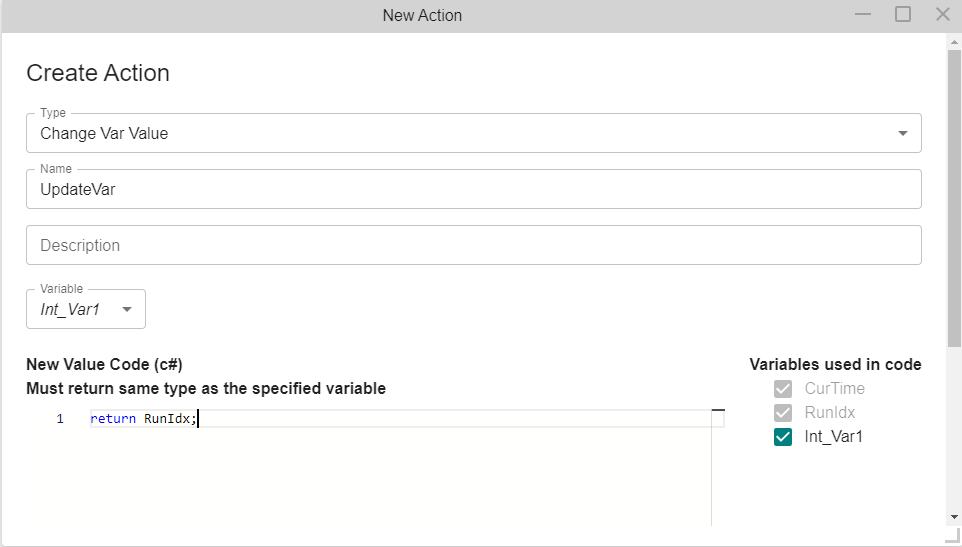
- Variable: Click the field to expand the drop down menu of variables you created in the model. Click on the variable to be updated. The value returned by the script is assigned to the variable, so one must be selected in order to create the event.
- New Value Code (c#): Type or copy and paste into this text field. The script must have a return value and that value must be the same type as the assigned variable or an error will occur. Other variables from the code can be used in the script if marked in the Variables section.
- Variables used in code: A list of variables available in the model. Pre-existing variables such as CurTime are auto checked and always available. See Dynamic Scripts for more information. It will include all of the variables that you create and are listed in the "All" Tab of the Left Navigation Frame. Click the check box to identify which variables are used in the code. Do not click the check box for the variable that is being updated even if it is used in the code. It only needs to be selected from the "Variable" dropdown menu.
External Simulation Message 
Listed as "Ext. Sim Message" in the dropdown menu. This action sends a message to an external code through coupled communication messaging protocol. See XMPP Protocol for details on coupling code to EMRALD.
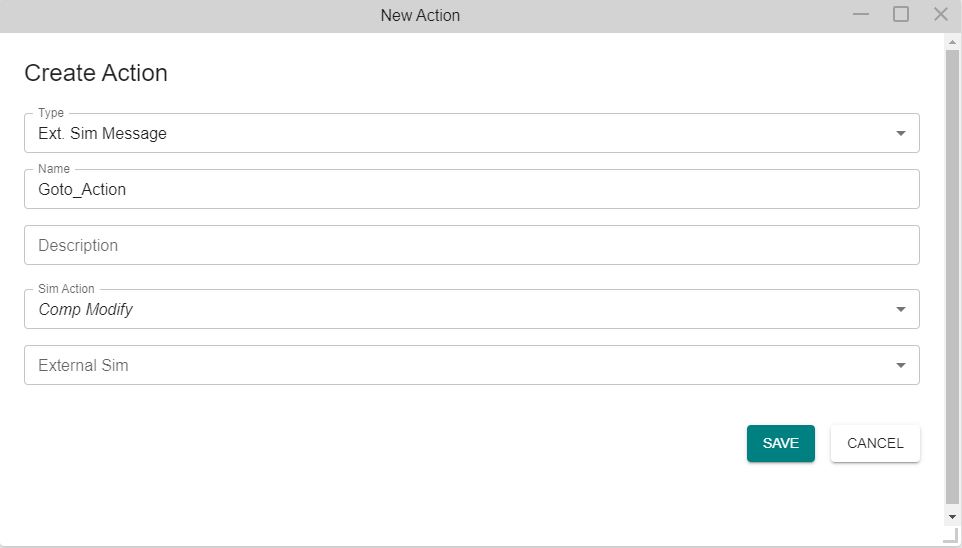
See External Simulation Message Action for more information.
Run Application 
Runs user defined scripts to both execute an external piece of code and process the results to direct state changes. 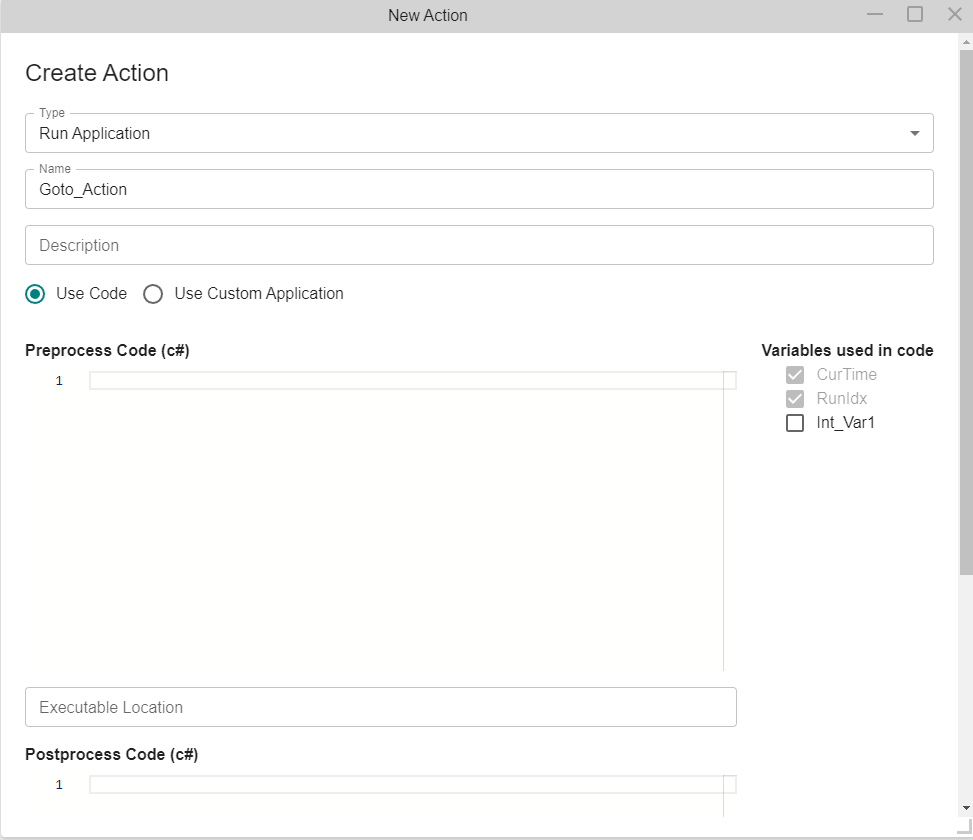
- Preprocess Code (C#): Type or copy and paste into this text field the C# code you would like to be executed before the executable is started when this action is triggered. this code must return a string and this string is passed as parameters on end of executable being run. For example if you are running notepad you could return "c:/somepath/file.txt" to open a specific file.
- Executable Location: Type or copy and paste into this text field the path to the executable.
- Postprocess Code (C#): Type or copy and paste into this text field the C# code you would like to be executed after the executable is finished. This code typically processes the results of the executable and determines what to do because of them. It must return a list of states to enter or exit. It is recommened that you use a C# compiler to test and debug code before entering it. See the video Coupling an Executable for detailed instructions and an example.
- Variables used in code: A list of variables available in the model. Click the check box to identify which variables are used in the code. Pre-existing variables such as CurTime are auto checked and always available. See Dynamic Scripts for more information. It will include the all of the variables that you create and are listed in the "All" Tab of the Left Navigation Frame.
Summary of Icons
Below is a table of icons that either identify the type of action (left hand side of action item) or identify the status of an action (right hand side of action item).
Icon | Description |
|---|---|
| Action Type | |
| Transition Action |
| Change Variable Value Action |
| External Simulation Message Action |
| Run Application Action |
| Status Icons | |
 | This click and drag from this icon to connect the action to a state. |
 | This icon appears instead of an arrow, when the transition goes to a state not in the current diagram. |